Create Vehicle In Fleet Management
Vehicle group -> Vehicle types -> Vehicle
1. Vehicle group
The Vehicle group screen is used to create and manage vehicle groups. The data of this screen will be used for the Vehicle menu screen
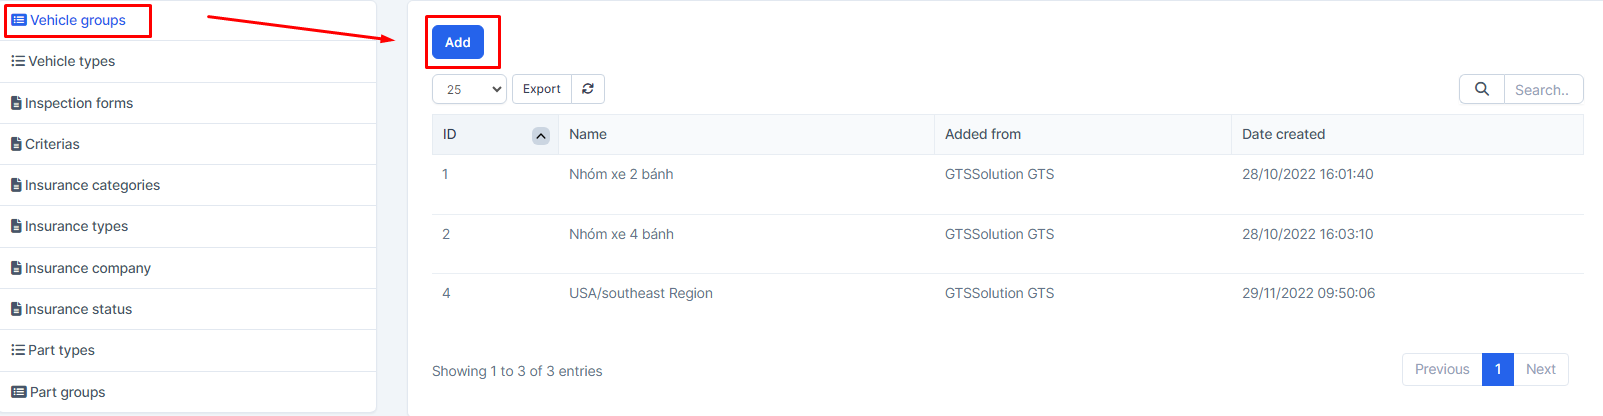
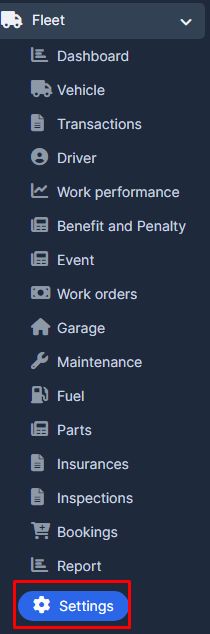
- Step 1: Select the Fleet module -> Select the Settings menu -> Select the Vehicle group screen -> Select the Add function available in the screen
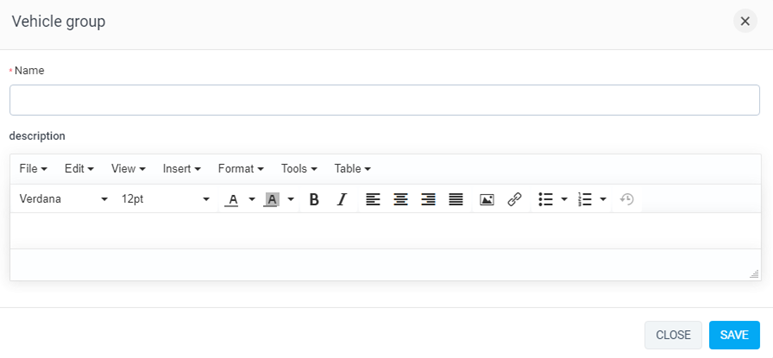
- Step 2: The system will display the Vehicle group screen -> Enter the necessary data -> Select Save to save the action you just made
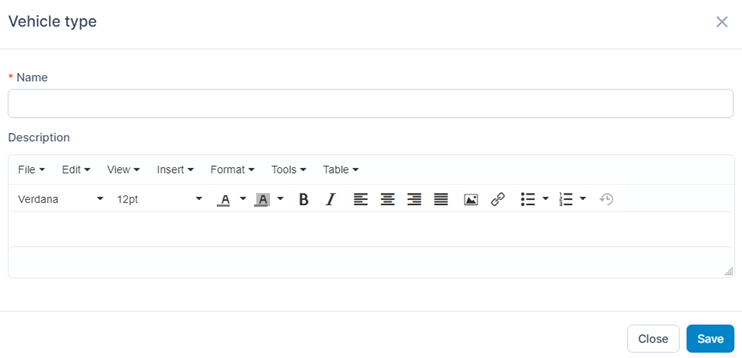
2. Vehicle types
The Vehicle types screen is used to create and manage vehicle types. The data of this screen will be used for the Vehicle menu screen
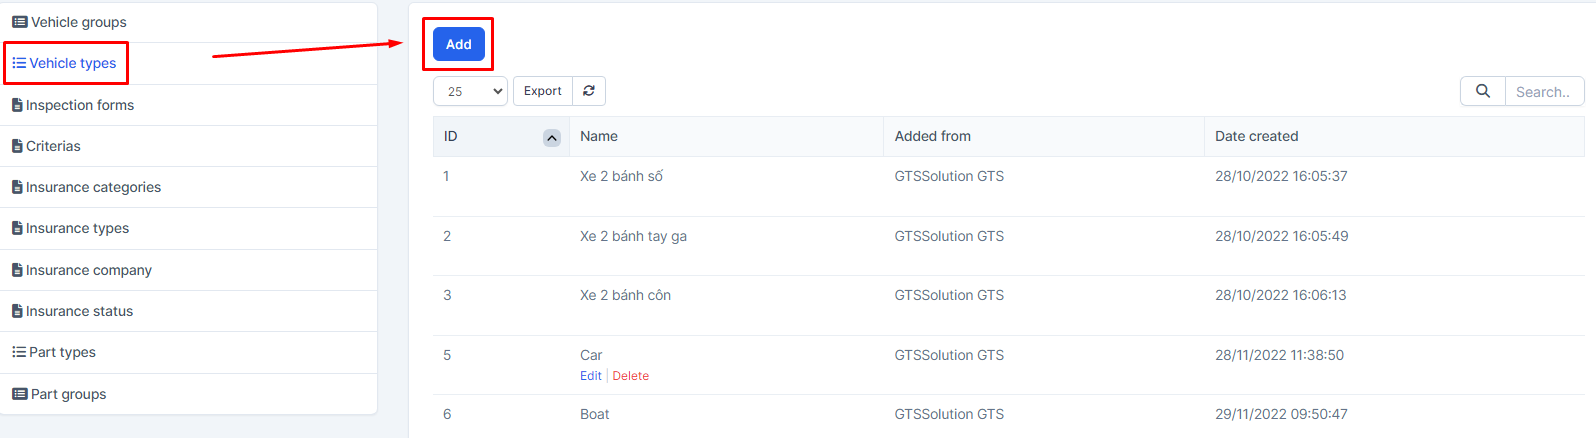
- Step 1: Select the Fleet module -> Select the Settings menu -> Select the Vehicle types screen -> Select the Add function in the screen
- Step 2: The system will display the Vehicle type screen -> Enter the necessary data -> Select Save to save the action you just made
Vehicle menu screen used to create and manage vehicles
- Step 1: Select the Vehicle menu screen -> Select the Add function in the screen
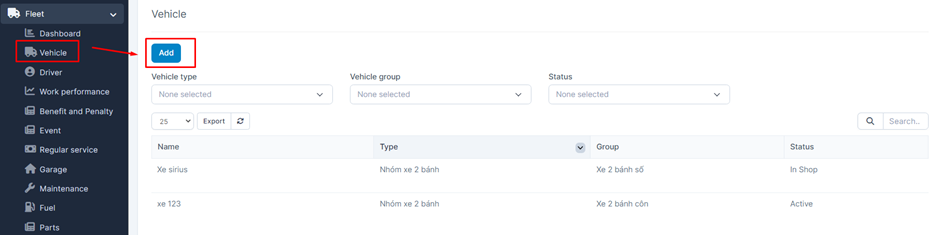
- Step 2: The system will display the Vehicle screen -> Proceed to enter the necessary data -> Select Save to save the operation just done
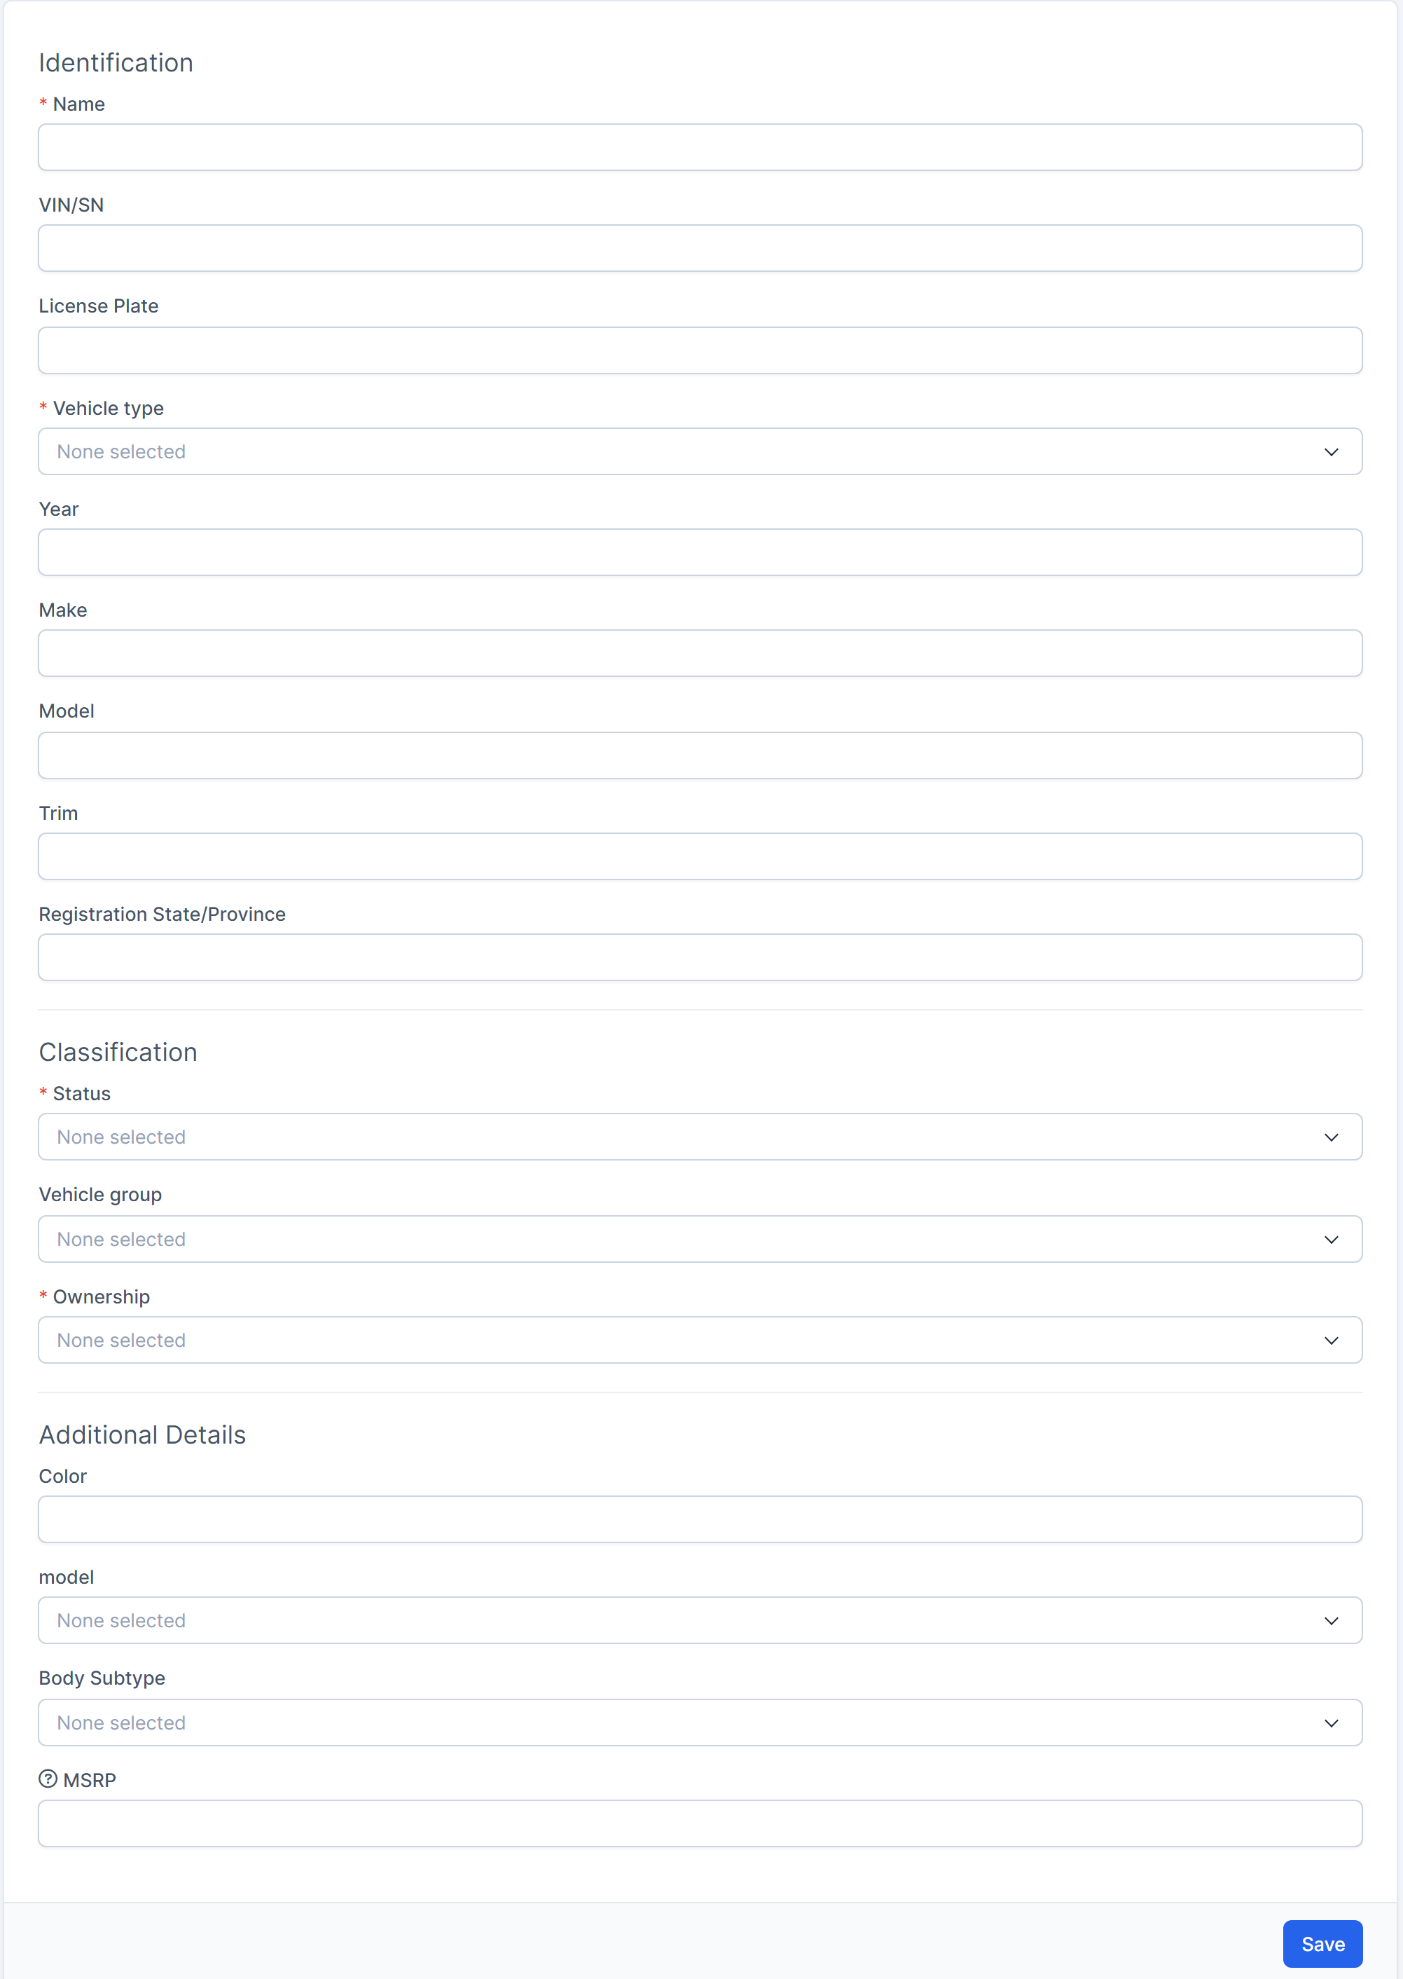
* Explanation:
o The Vehicle type field gets data from the Vehicle types screen
o The Vehicle group field gets data from the Vehicle groups screen
Create Inspections In Fleet Management
Inspection forms -> Vehicles -> Inspections -> Inspections Report
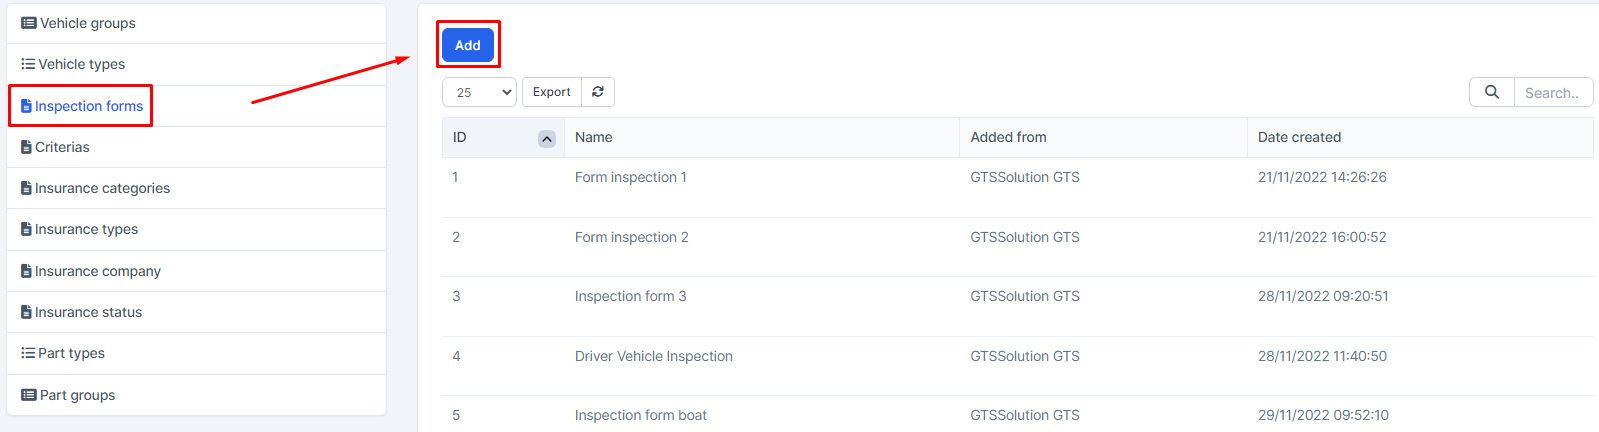
The Inspection forms screen is used to create and manage vehicle inspection forms before or after use. The data of this screen will be used for the Inspection menu screen
- Step 1: Select the Fleet module -> Select the Settings menu -> Select the Inspection forms screen -> Select the Add function included in the screen
- Step 2: The system will display the Add new Inspection form screen -> Enter the necessary data -> Select Save to save the operation just done and move to step 3
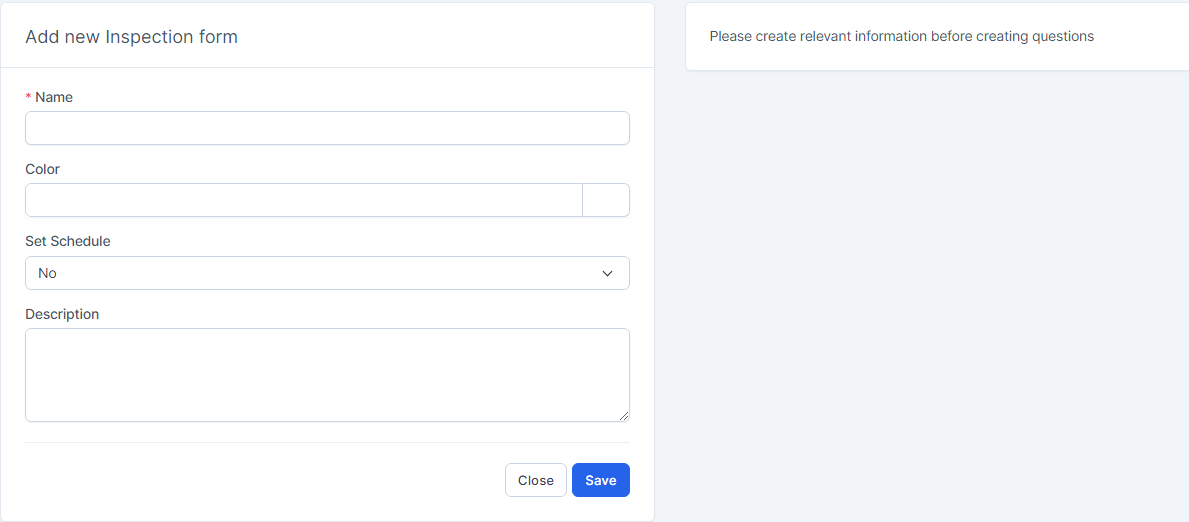
* Explanation:
The Set Schedule field is used to choose the time to automatically create the next inspection. Currently, this field is only selected for display, not for processing functions. Will update in the next versions
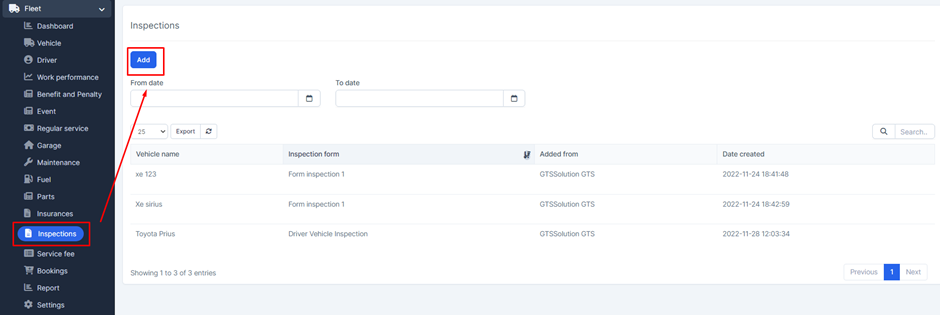
2. Inspections
The Inspections screen is used to create and manage vehicle inspection information before or after the vehicle is booked.
The data at this screen will also be displayed in the corresponding Inspections screen of the vehicle when viewing the information
- Step 1: Select the Inspection menu screen -> Select the Add function included in the screen
- Step 2: The system will display the Inspection screen -> Enter the necessary data -> Select Save to save the action you just made
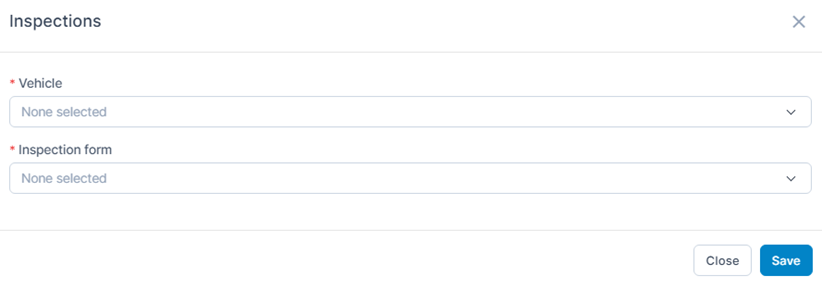
* Explanation:
o The Vehicle field gets its data from the Vehicle menu screen
o The Inspection form field gets data from the Inspection form screen in the setting
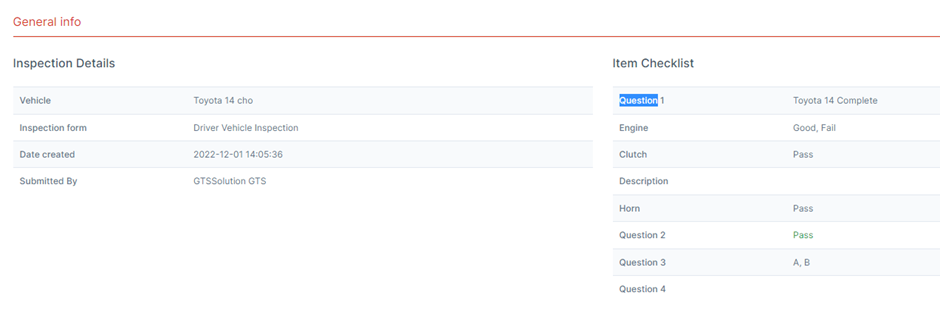
- Step 1: Select the menu Inspection -> Select the View function available in the screen corresponding to the data line to view information
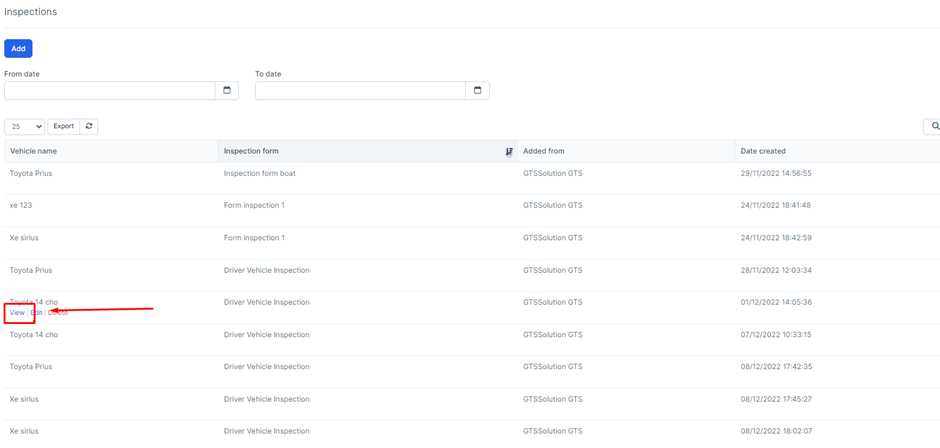
- Step 2: The system will display a screen containing relevant information of the corresponding Inspection
- Step 1: Select the menu Inspection -> Select the Edit function in the screen corresponding to the data line to be edited
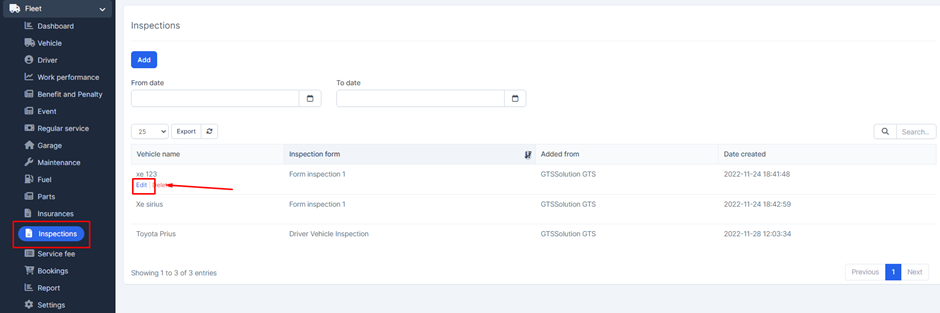
- Step 2: The system will display the Edit Inspection screen -> Proceed to edit the data -> Then click Save to save the operation or select Close to close the screen and cancel the action just done. The data displayed inside is taken from the data setting in the created Inspection form

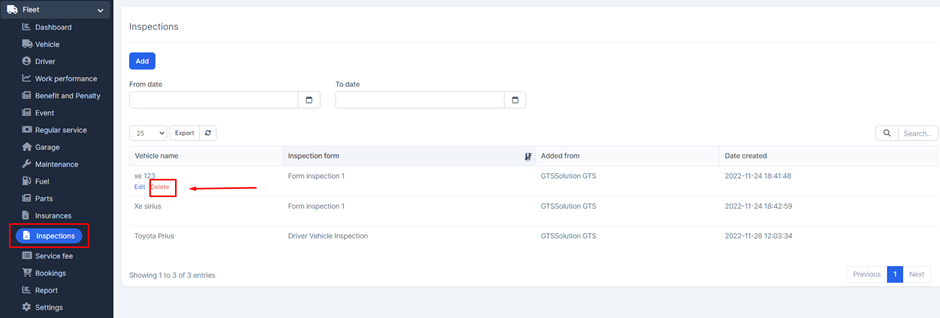
Select the menu Inspection -> Select the Delete function in the screen corresponding to the data line to be deleted
Create Benefit And Penalty In Fleet Management
Criteria -> Driver -> Benefit & penalty
1. Criteria
The Criteria screen is used to create evaluation criteria for the Driver. The data at this screen will be used for the Benefit and Penalty menu screen
- Step 1: Select the Fleet module -> Select the Settings menu -> Select the Criterias screen -> Select the Add function available in the screen
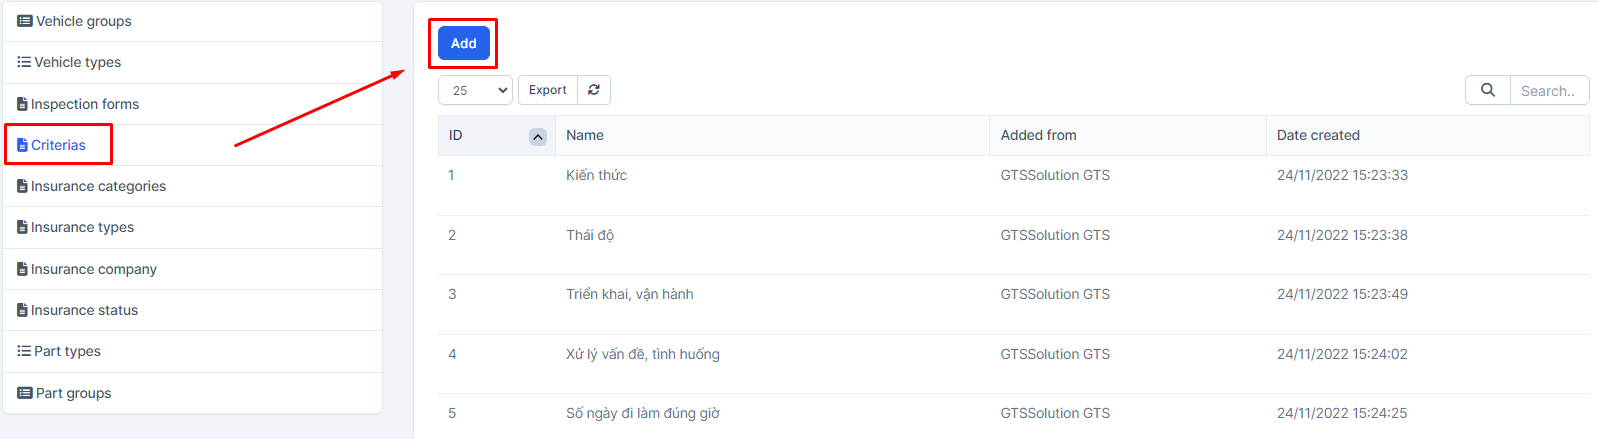
- Step 2: The system will display the Criteria screen -> Enter the necessary data -> Select Save to save the action you just made

The Driver screen is used to create a driver. The data at this screen will be used for the screens in Fleet

- Step 2: The system will display the Driver screen -> Proceed to enter the necessary data -> Select Save to save the operation just done

* Explanation:
The name of the Driver is taken from the Hr Records screen of the Hr Records menu. Since the driver is also an employee, we can create the employee information first and then assign the employee a Driver. Or you can also create staff through the Staff screen in Setup
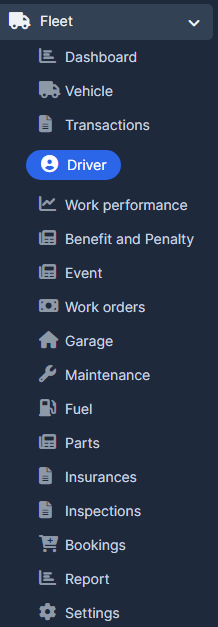
3.Benefit & Penalty
The Benefit & Penalty screen is used to generate reward or penalty data for the Driver.
The data at this screen will also be displayed in the Benefit & penalty screen in the Driver Information View
- Step 1: Select the Benefit & penalty menu screen -> Select the Add function in the screen
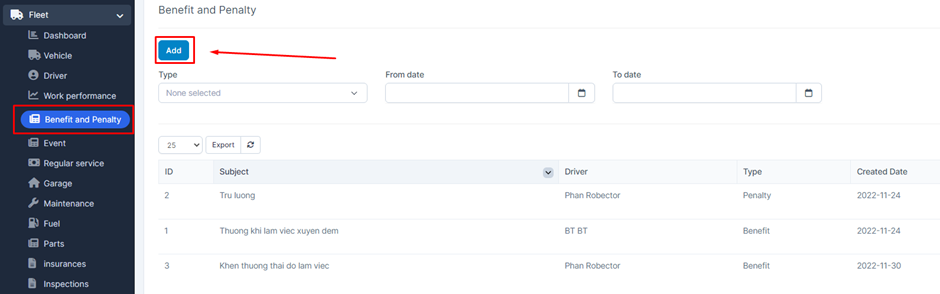
- Step 2: The system will display the Benefit & penalty screen -> Enter the necessary data -> Select Save to save the action you just made
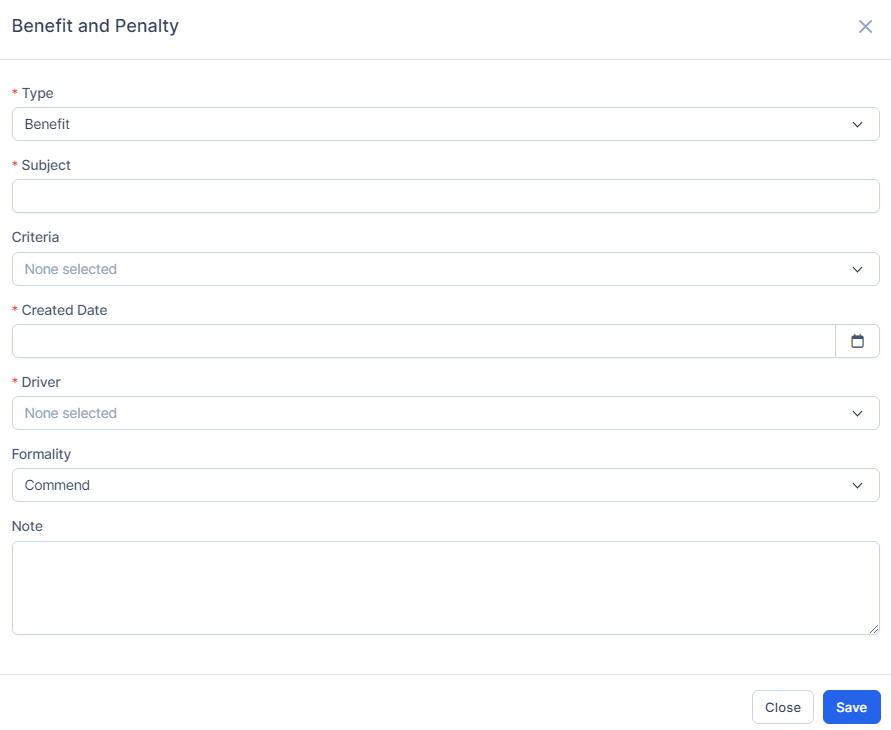
* Explanation:
o The Type field has 2 types: Benefit and Penalty
o The Criteria field gets its data from the Criteria screen
o The Driver field gets data from the Driver screen
o The Formality field has 2 types, Commend and Bonus Money if the Type is Benefit. If Type is selected as Penalty, it will display as Remind and Compensate
Create Insurance In Fleet Management
Insurance categories -> Insurance types -> Insurance company -> Insurance status -> Vehicle -> Insurances
The Insurance categories screen is used to create and manage Insurance categories. The data at this screen is used for the Insurance menu screen
- Step 1: Select the Fleet module -> Select the Settings menu -> Select the Insurance categories screen -> Select the Add function available in the screen
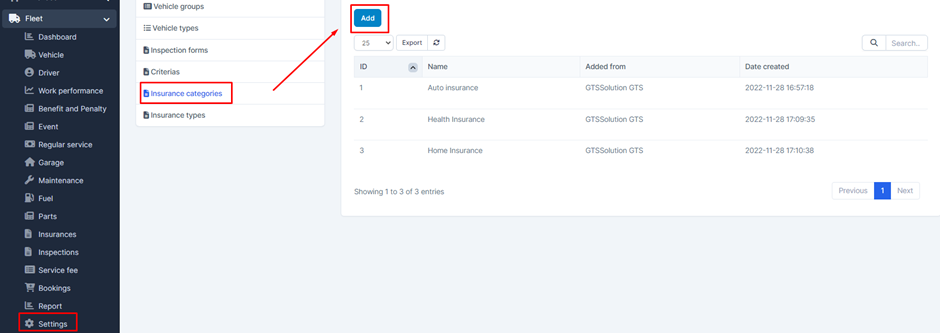
- Step 2: The system will display the Insurance category screen -> Enter the necessary data -> Select Save to save the action you just done

The Insurance types screen is used to create and manage Insurance types. The data at this screen is used for the Insurance menu screen
- Step 1: Select the Fleet module -> Select the Settings menu -> Select the Insurance types screen -> Select the Add function available in the screen
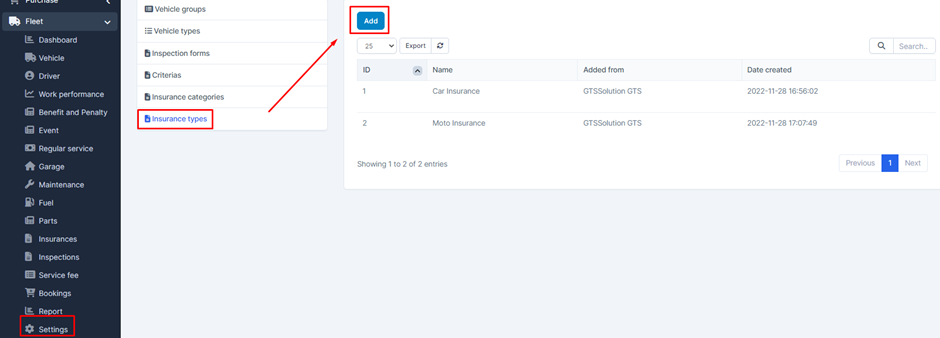
- Step 2: The system will display the Insurance type screen -> Enter the necessary data -> Select Save to save the action you just made

Insurance company screen is used to create and manage Insurance company. The data at this screen is used for the Insurance menu screen
- Step 1: Select the Fleet module -> Select the Settings menu -> Select the Insurance company screen -> Select the Add function available in the screen
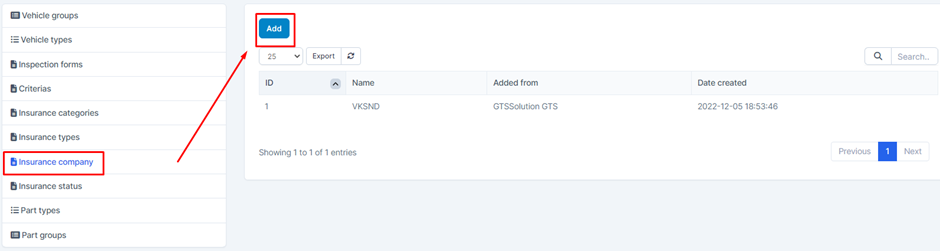
- Step 2: The system will display the Insurance company screen -> Enter the necessary data -> Select Save to save the action you just made

The Insurance status screen is used to create and manage Insurance status. The data at this screen is used for the Insurance menu screen
- Step 1: Select Fleet module -> Select Settings menu -> Select Insurance status screen -> Select Add function available in the screen
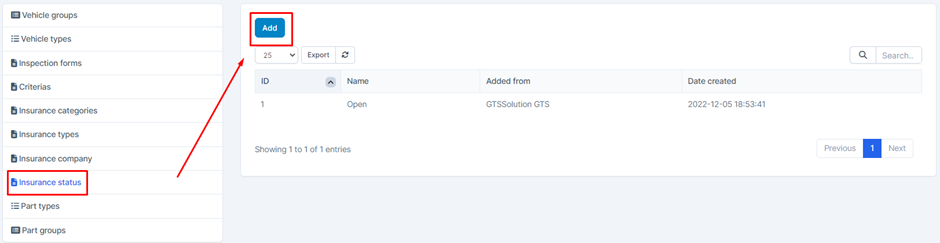
- Step 2: The system will display the Insurance status screen -> Enter the necessary data -> Select Save to save the action you just made

5. Vehicles
Create-vehicle-in-fleet-management
6. Insurances
The Insurances screen is used to create and manage Vehicle Insurance. The data generated at this screen will also be displayed on the corresponding Vehicle's Insurances screen
- Step 1: Select the Insurances menu screen -> Select the Add function available in the screen
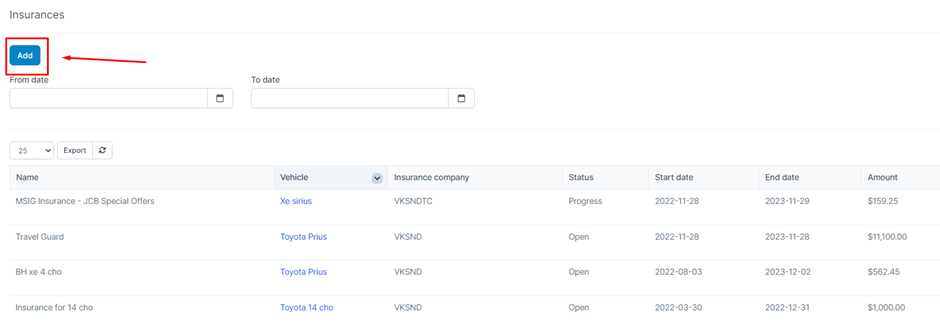
- Step 2: The system will display the Insurances screen -> Enter the necessary data -> Select Save to save the action you just made
Create Part In Fleet Management
Part types -> Part groups -> Vehicles -> Parts
1. Part types
The Part type screen is used to create and manage Part types. The data generated at this screen will be used for the Parts menu screen
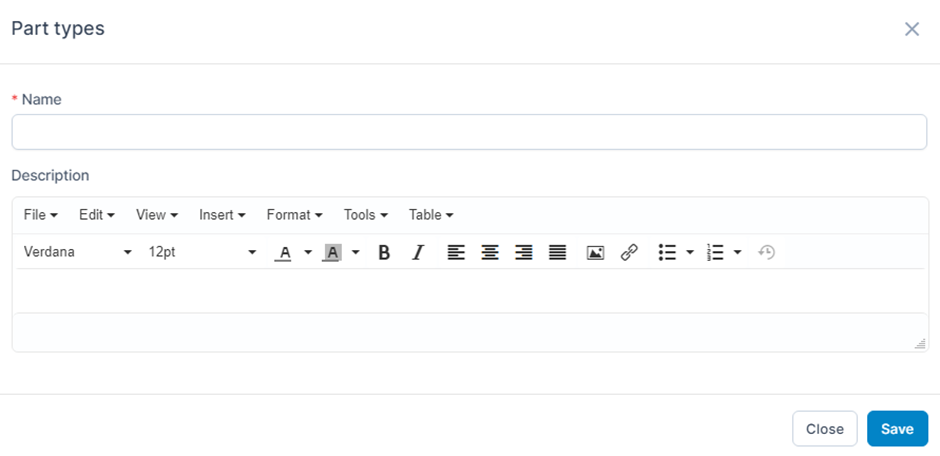
- Step 1: Select the Fleet module -> Select the Settings menu -> Select the Part types screen -> Select the Add function available in the screen
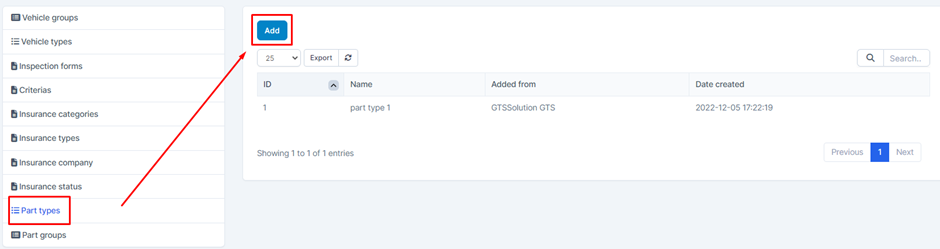
- Step 2: The system will display the Part type screen -> Enter the necessary data -> Select Save to save the action you just made
The Part groups screen is used to create and manage Part types. The data generated at this screen will be used for the Parts menu screen
- Step 1: Select the Fleet module -> Select the Settings menu -> Select the Part groups screen -> Select the Add function available in the screen
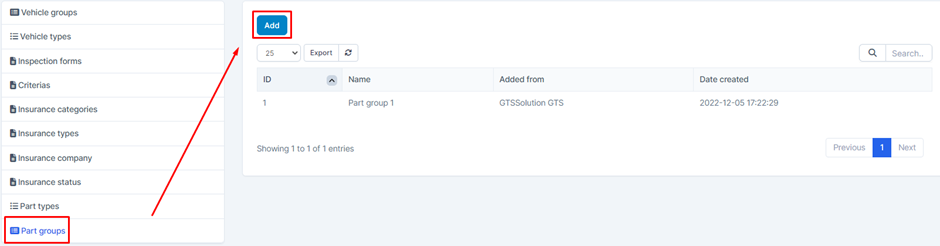
- Step 2: The system will display the Part group screen -> Enter the necessary data -> Select Save to save the action you just made

3. Vehicles
Create-vehicle-in-fleet-management
4.Parts (components, accessories for vehicles)
The Parts screen is used to create and manage items. This item is the components and accessories for the vehicle during maintenance
Parts will be used for the Maintenance and Work Orders menu screens
- Step 1: Select the Parts menu screen -> Select the Add function included in the screen
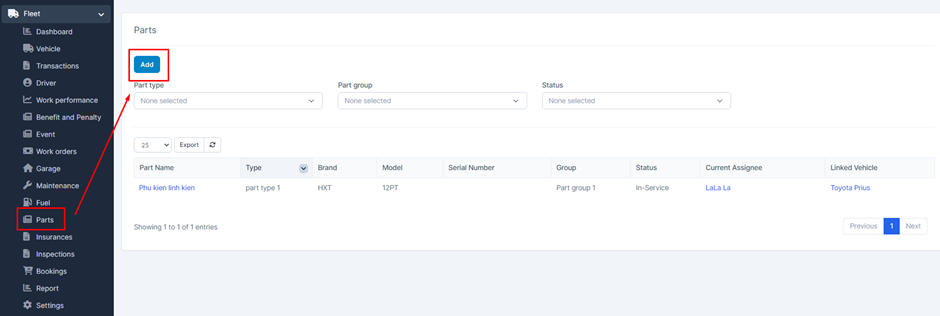
- Step 2: The system will display the Add new part screen -> Enter the necessary data -> Select Save to save the action you just made
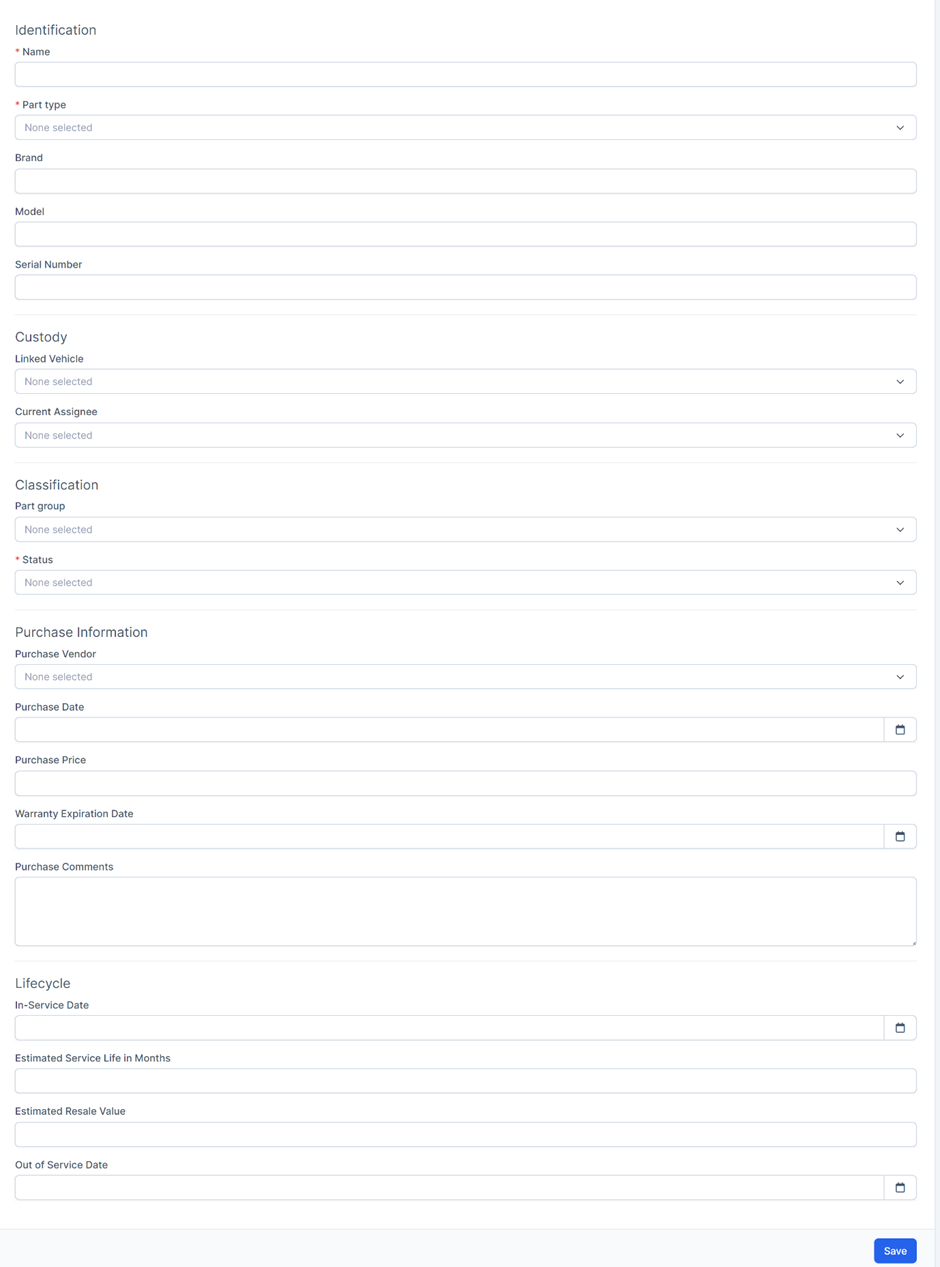
* Explanation:
o The Part type field gets data from the Part types screen in Settings
o If the Linked Vehicle field is selected, the system will record the log checkout for the corresponding Part for the vehicle in the Linked Vehicle History screen of the Part. Log data will also be displayed on the Parts screen in Vehicles
o If the Current Assignee field is selected, the system will record the log checkout for the corresponding Part for the Driver in the Assignment History screen. Log data will also be displayed on the Parts screen in Vehicles
o The Part group field gets data from the Part groups screen in Settings
o The Purchase vendor field gets its data from the Vendors menu screen of the Purchases module
View Vehicle Information In Fleet Management
- Step 1: Select the Vehicle menu screen -> Select the View function corresponding to the data to see detailed information
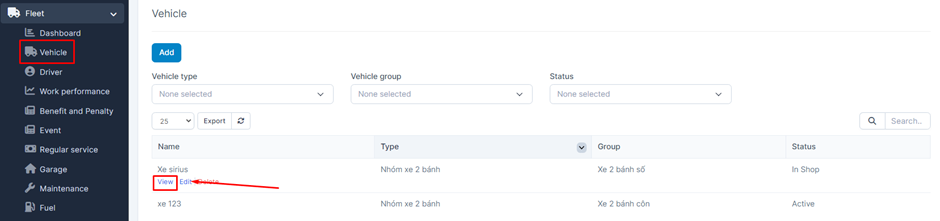
- Step 2: The system will display a screen containing the corresponding information of the data
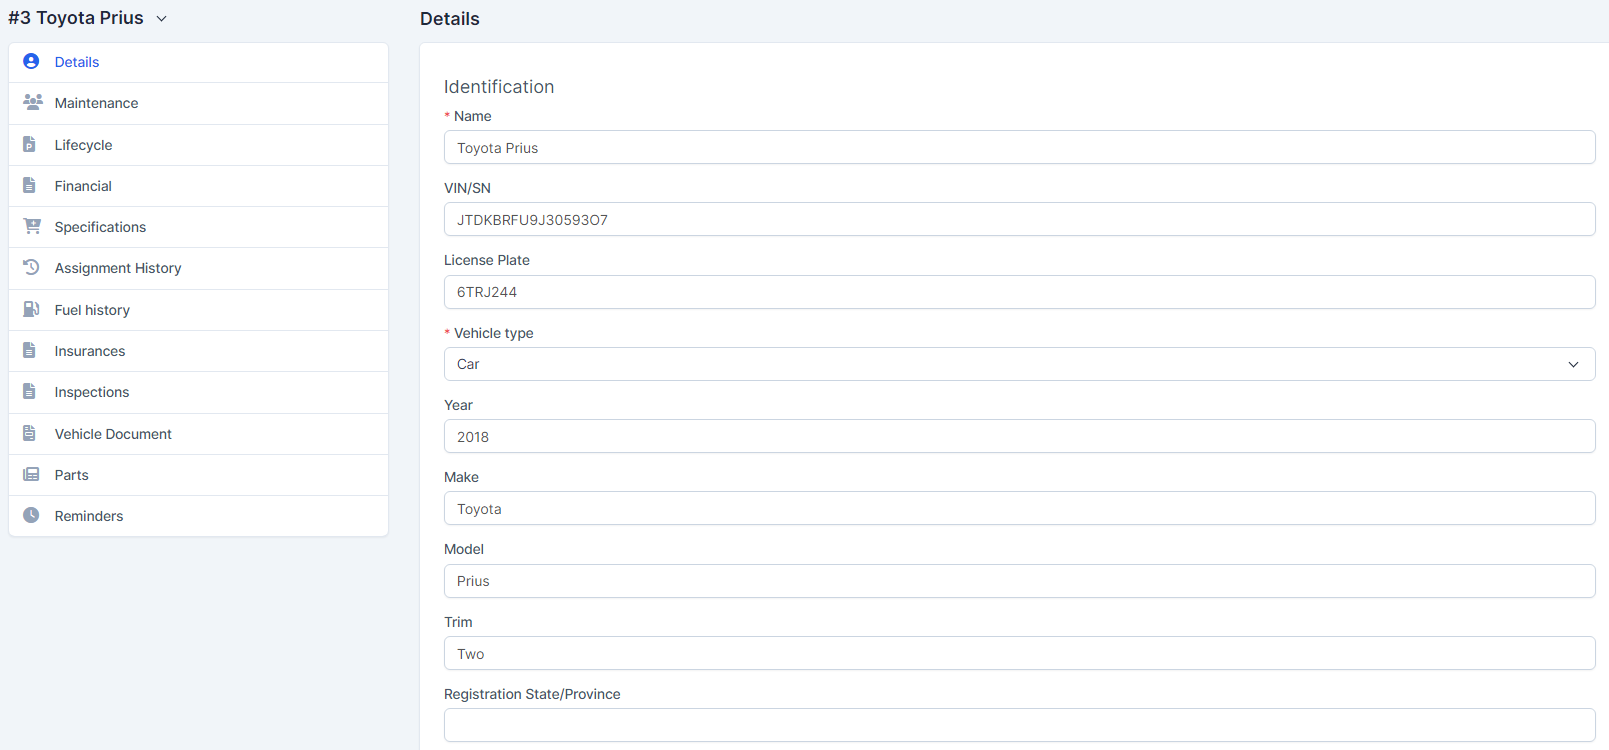
The Details screen is used to display vehicle information such as vehicle group, vehicle type, ...
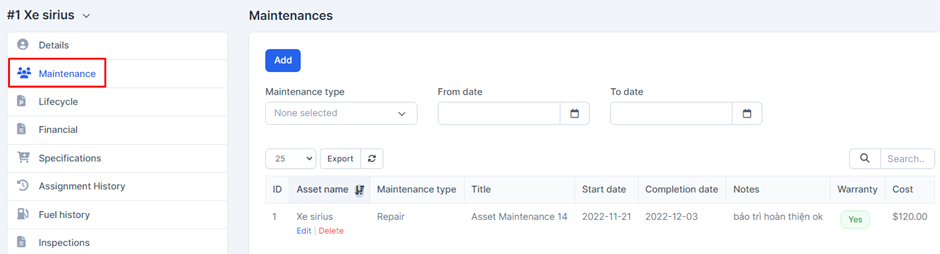
The Maintenance screen is used to display the Maintenance information of the respective vehicle. The display data is taken from the Maintenance menu screen. Can add, delete, edit corresponding Maintenance data
The Lifecycle screen is used to display the Lifecycle information of the respective vehicle
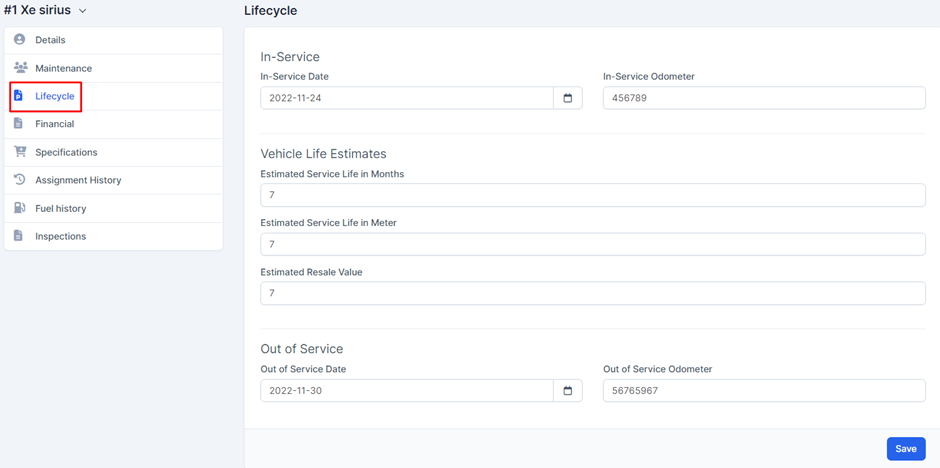
If the Odometer field is entered, this value will be taken by the system to calculate when the vehicle is using Fuel. The value is considered as the original mileage of the vehicle when not in use
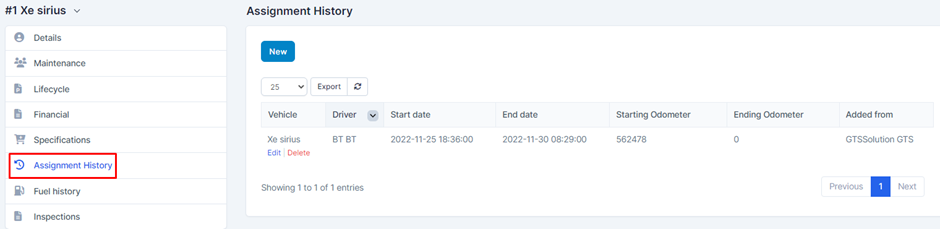
The Assignment History screen is used to create and manage vehicle delivery history for drivers. The data added at this screen will also show up in the Vehicle assignments screen of the Driver menu.
When creating data successfully, the system will notify Driver
The Fuel history screen is used to create and manage the Fuel transaction history display associated with the respective vehicle. The data displayed at the screen is taken from the Fuel menu screen. At the same time, the data generated from this screen will also be synchronized with the Fuel menu screen
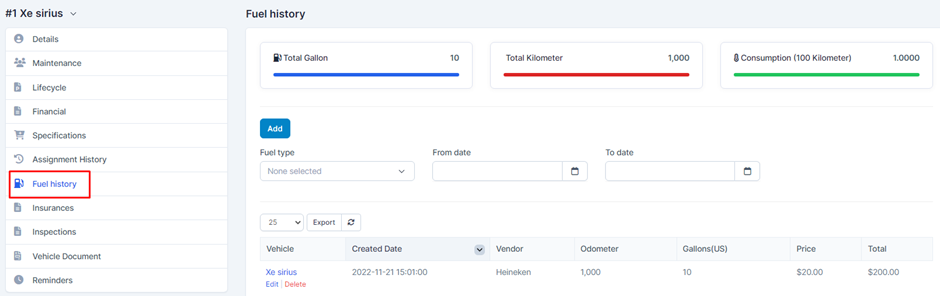
* Explanation:
o The Total Gallon field will show the total Gallon for which the vehicle has been supplied
o The Total Kilometer field will show the number of kilometers traveled by the vehicle (maximum value - minimum value = number of kilometers traveled)
o The Consumption field (100 Kilometers) will show the total consumption value of the vehicle. Formula: (Total Gallon / Total Kilometer) *100
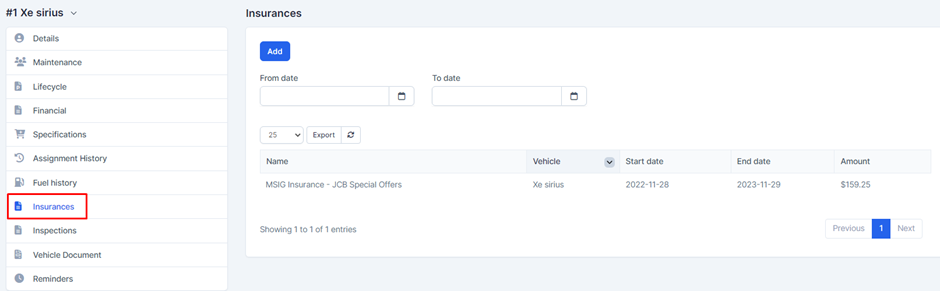
The Insurances screen is used to create and manage the Insurances data associated with the respective vehicle. The data displayed at the screen is taken from the Insurances menu screen. At the same time, the data generated from this screen will also be synchronized with the Insurances menu screen
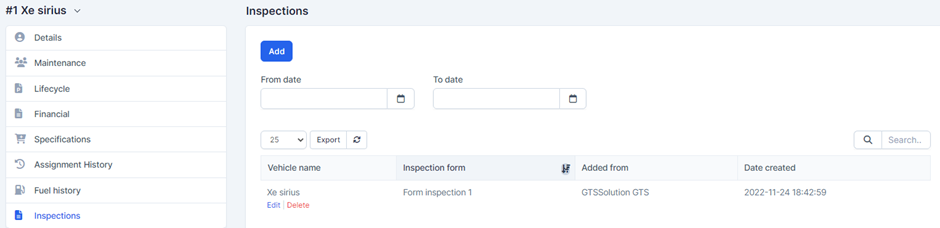
The Inspection screen is used to create and manage the Inspection data associated with the respective vehicle. The data displayed at the screen is taken from the Inspections menu screen. At the same time, the data generated from this screen will also be synchronized with the Inspections menu screen
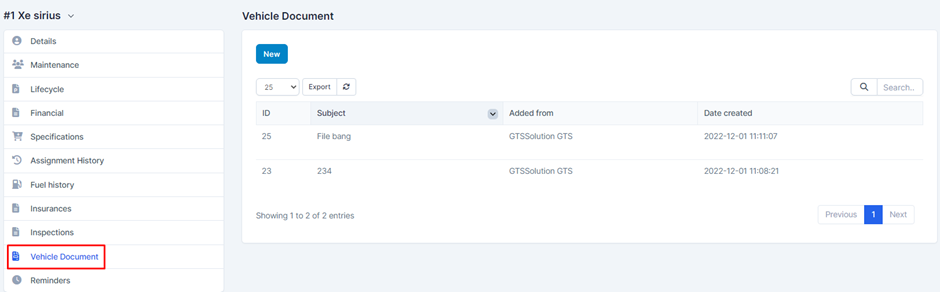
The Vehicle Document screen is used to update documents related to the respective vehicle
The Parts screen is used to display the current checkout history of the Part for the respective vehicle. Data taken from the Assignment History and Linked Vehicle History screens of the Parts menu
12. Reminders
The Reminders screen is used to create and manage reminders for employees. For example: vehicle warranty expiration reminder, vehicle expiration date, .... Is notified field? If the reminder has not been sent, the system will display the value No. If the reminder has been sent successfully, it will display Yes. If the Send an Email field is selected, the system will simultaneously send the selected person an email notification

* Explanation:
o The Vehicle field gets its data from the Vehicle menu screen
o The Insurance company field gets data from the Insurance Company screen in Settings
o The Insurance status field gets data from the Insurance Status screen in Settings
o The Insurance category field gets data from the Insurance category screen in Settings
o The Insurance type field gets data from the Insurance type screen in Settings
View Driver Information In Fleet Management
- Step 1: Select the Driver menu screen -> Select the View function corresponding to the data to be viewed

- Step 2: The system will display a screen containing the corresponding information of the data
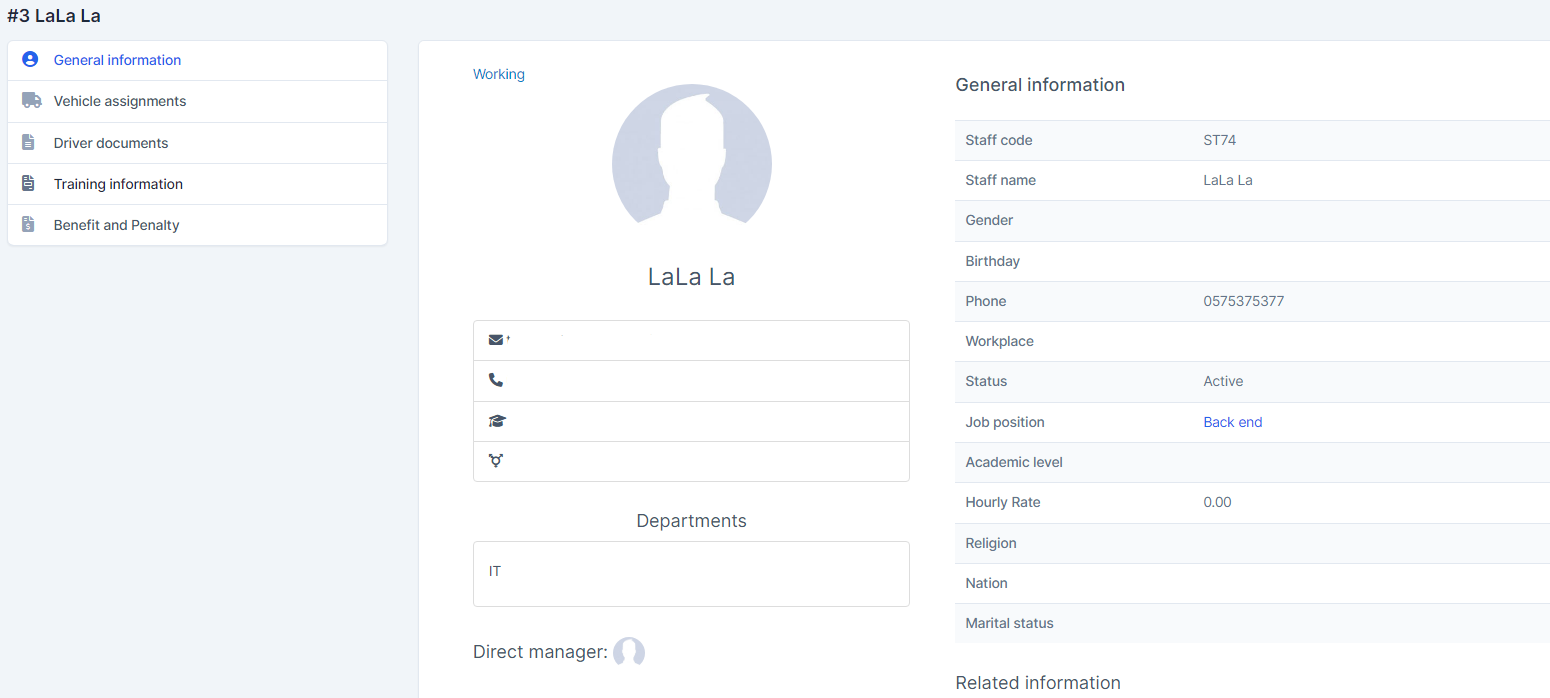
The General information screen is used to display basic information of the Driver. The data of the monitor is taken from the menu screen Hr Records or Staff
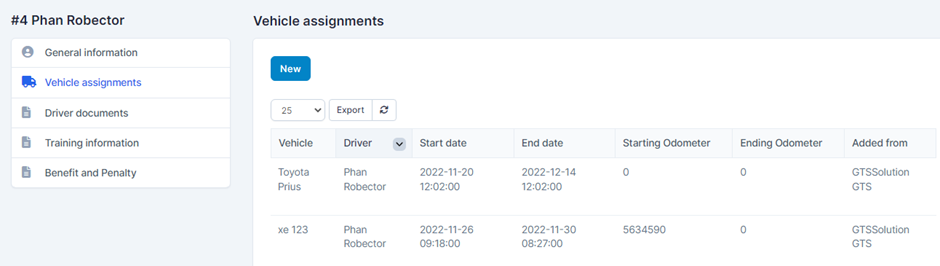
The Vehicle assignments screen is used to record the driver's vehicle usage history. When the data is successfully generated, the driver will be notified
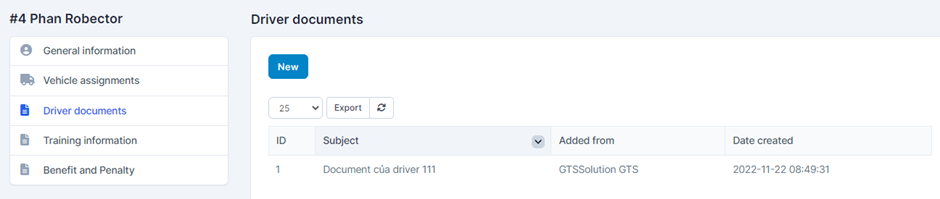
Drive document screen is used to update driver-related documents
4. Training information screen
The Training information screen will display the Driver's Training information. The display data is taken from the Training Program screen created for the employee. We can also create training history information for drivers through the Add training function
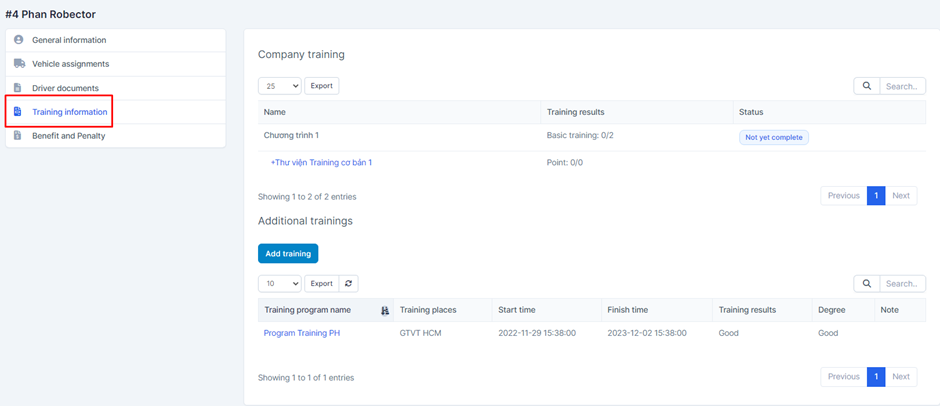
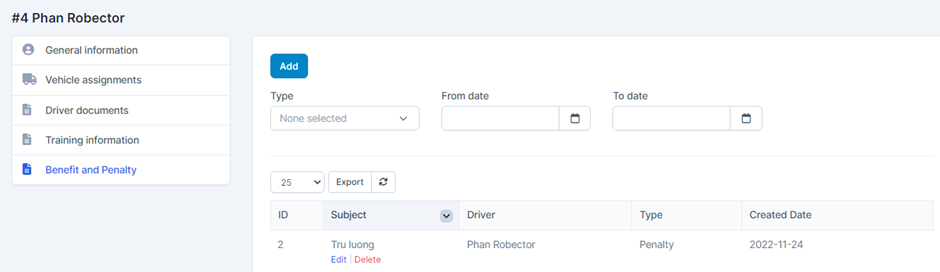
The Benefit and Penalty screen will display a list of the respective Driver's reward and penalty data. The data is taken from the Benefit and Penalty menu screen for display. At this screen, you can also create, edit and delete driver reward and punishment information
Create Maintenance In Fleet Management
Vehicles -> Garages -> Parts -> Maintenances
1. Vehicles
Create-vehicle-in-fleet-management
2. Garages
The Garage screen is used to create and manage a list of garages. The data of this screen will be used for the Maintenance screen
- Step 1: Select the Garage menu screen -> Select the Add function included in the screen
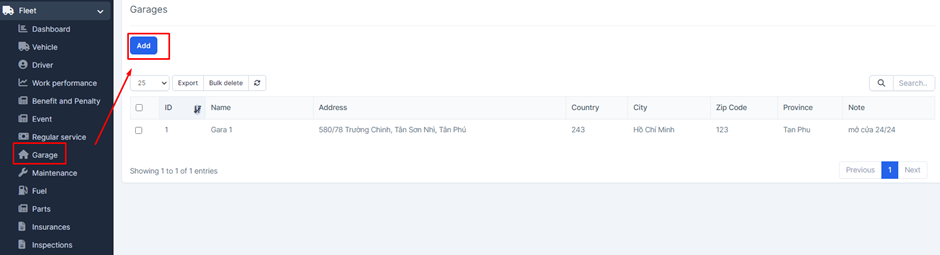
- Step 2: The system will display the Garage screen -> Enter the necessary data -> Select Save to save the action you just made

- Step 1: Select the Garage menu screen -> Select the View function available in the screen corresponding to the data you need to view information

- Step 2: The system will display a general info screen containing information of the corresponding Garage
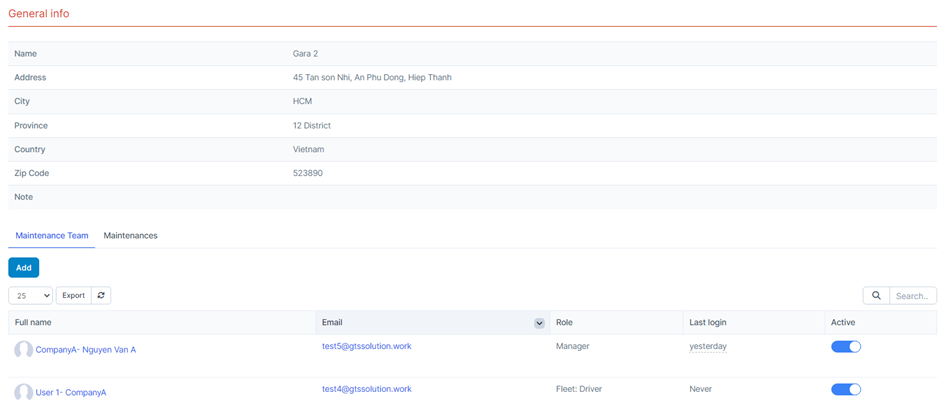
* Explanation:
o Maintenance Team tab screen: The Add function in the screen is used to add Maintenance team. The staff list is obtained from the Hr Records screen of the Hr Record module or the Staff screen in Setup. Maintenance team is like a group of employees who support maintenance in the garage
o The Maintenances tab screen will display a list of vehicles that have been serviced at the garage. Data is taken from the Maintenances menu screen
3. Parts
Create-part-in-fleet-management
4. Maintenances
The Maintenance screen is used to create and manage the vehicle's maintenance history. The data generated at this screen will also be displayed in the corresponding Vehicle's Maintenance screen
The data will also be displayed at the Maintenance tab screen of the respective Garage data
4.1. Create Maintenance
- Step 1: Select the Maintenance menu screen -> Select the Add function in the screen
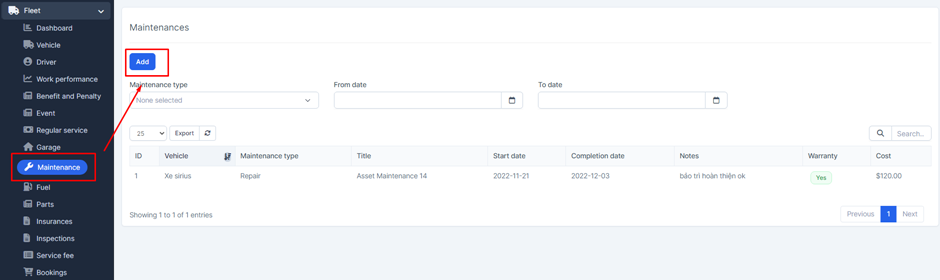
- Step 2: The system will display the Maintenance screen -> Enter the necessary data -> Select Save to save the action you just made
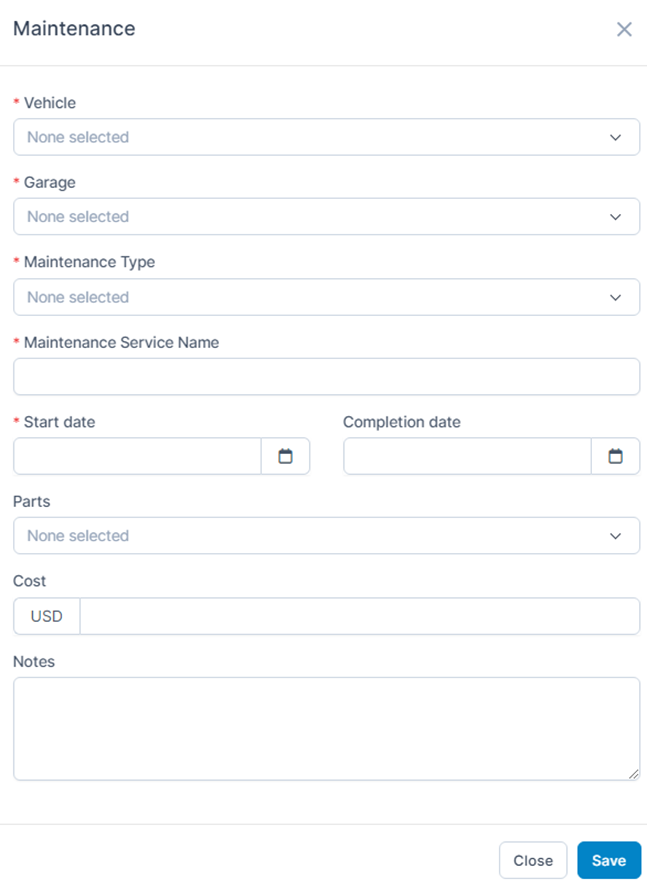
* Explanation:
o The Vehicle field gets its data from the Vehicle menu screen
o The Garage field retrieves data from the Garages menu screen
o The Parts field gets data from the Parts menu screen
o The Start date and Complete date fields are used to select the start and end dates of maintenance for the vehicle.
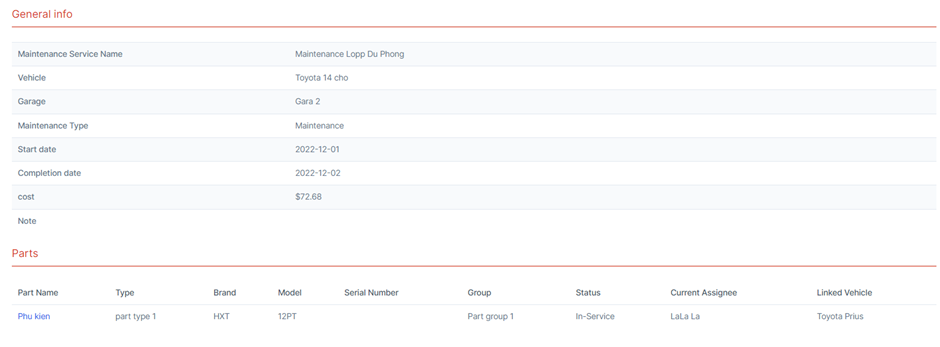
- Step 1: Select the menu Maintenance -> Select the View function available in the screen corresponding to the data line to view information
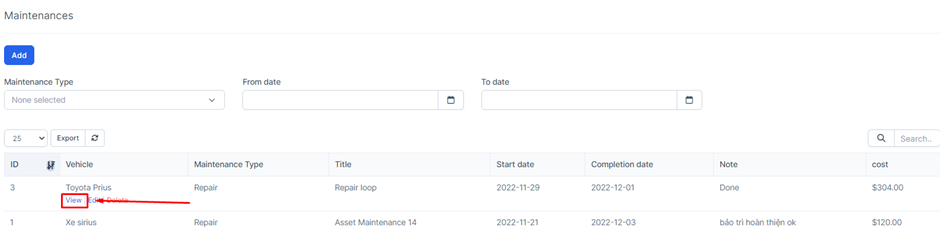
- Step 2: The system will display a screen containing the corresponding Maintenance information
Bookings And Work Performance In Fleet Management
Bookings -> Work performance
1. Bookings
The Bookings screen is used to create and manage vehicle booking requests from customers
*Major:
o When a new booking arises, the company will contact the customer again and quote a price -> If successful, it will change the status to Approved and update the amount of the Booking, then can create an Invoice -> If not agree then change to Rejected
o In case the agreement is successful, when the delivery date arrives, the driver will switch to Processing state -> When delivery is successful, switch to Complete
o If it fails or the customer cancels the transaction, it will switch to Canceled